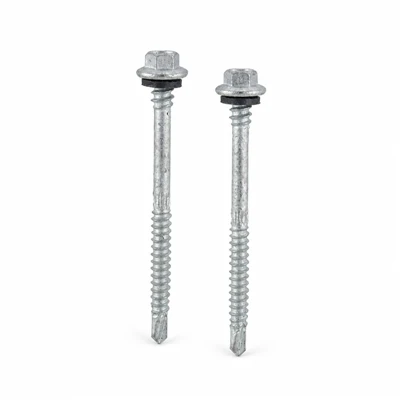
A through-fastened FRP roof that leaks in its second year is often not a panel failure. The sheet is still there and still intact. Water is coming through a hole that somebody made on purpose, months earlier, with a drill.
Three places a through-fastened roof tends to leak
At the screw itself. This is the most common place to look first.
At the side lap, where two sheets overlap. Leaks here usually come from a fastener pattern that is too thin, or from sealant tape that is missing or misplaced.
At the details: ridges, eaves, flashings and penetrations, where the sheet changes direction and the loads change with it. Leaks here also depend on lap width, sealant and flashing, not only on the screws.
Most of these paths run through a fastener, which is why fasteners deserve the same attention as the sheet.
Five ways a fastener starts leaking
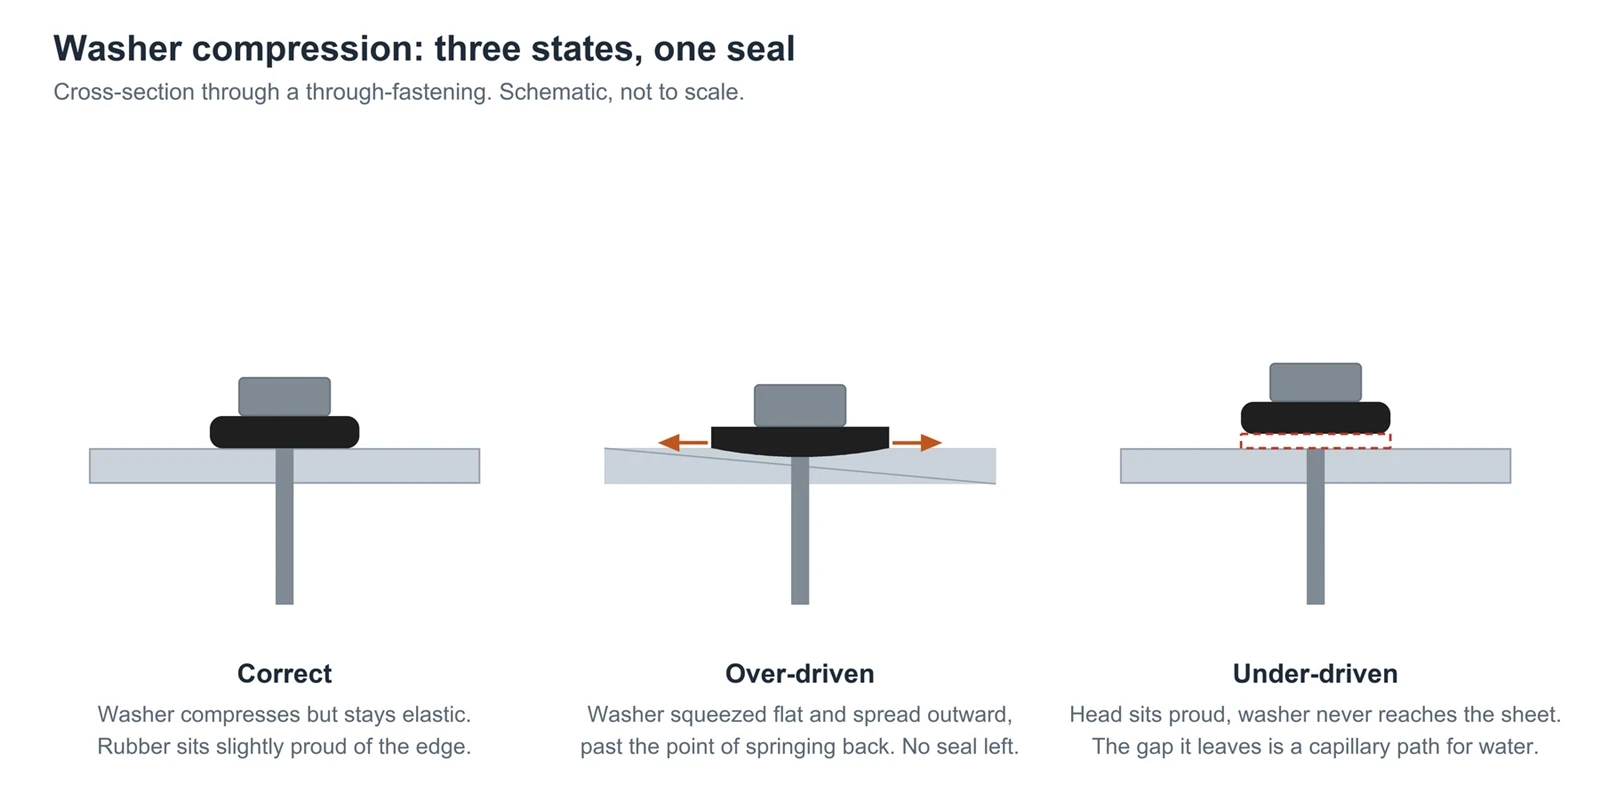
Over-driving. An impact driver at full power seats the screw, keeps turning, and flattens the washer past the point where it can spring back. The seal looks fine from standing height, but it is no longer a seal. It is a compressed disc.
Under-driving. The screw sits proud, the washer never compresses against the sheet, and a capillary path stays open between the panel and the head. Water does not need a gap you can see. It needs a gap it can crawl through.
Fastening in the wrong place on the profile. On a corrugated sheet, the low point is where water runs. A hole there sits in the drainage path, and the washer rarely seats evenly. Fix on the crest, in a straight line.
Metal shavings left on the panel. Drilling throws steel shavings (swarf). They sit on the surface, rust, stain the sheet, and in the worst case hold a washer slightly off its seat. Brush or blow the line clean as you go. It takes seconds at install and saves a service call later.
No allowance for movement. FRP typically expands and contracts more with temperature than steel does. A screw that clamps the sheet rigidly works the washer loose over a few seasons. The usual remedy is to pre-drill the sheet with an oversized hole, then drive the screw through it into the purlin, so the sheet can move around the shank while the washer still seals.
A practical tip on tightening: use a drill or driver with torque or clutch adjustment, and test on an offcut first. The washer should be gently compressed, with the rubber slightly visible around the edge, not squeezed out or split.
What decides fastener spacing
Spacing is not a constant, and a single number quoted for every roof ignores what the site actually demands. Four inputs set it:
Wind load at the site and the pressure zone the roof area sits in. Corners and edges carry more than the middle of the field.
Purlin spacing as drawn.
Sheet profile, meaning pitch and crest width.
Sheet thickness.
A pattern that is sound for a thin sheet at a sheltered inland site may not be sound for a thicker sheet on a coastal warehouse. The load path is different in each case.
Laps, ridges, eaves and corners normally take a denser pattern than the field. Even spacing everywhere is often a sign the pattern was copied from another project.
To propose a pattern, we need three things: your purlin layout, the sheet profile and thickness, and the wind region. Please note this is an installation reference only. The final fastening design should be confirmed by the project's structural engineer.
What to check when the screws arrive
The washer. EPDM, sized to the screw head so it compresses evenly instead of folding over the edge.
The coating. Matched to the environment. A screw that lasts on an inland warehouse roof is not automatically right for a chemical plant or a coastal site.
The drill point and thread. Matched to your purlin thickness. A screw that does not fully engage the purlin is not a fastener, it is a placeholder.
The length. It must pass through the panel and bed into the purlin, not stop at the panel.
One habit that prevents many callbacks
At the end of each day, look back along the fastener lines from the eave or from the scaffold.
A washer that is dished, split, or sitting proud is visible from that angle. So is a line of screws that wanders off the crest. Both are cheap to fix on the day and expensive to fix after the flashings are closed and the scaffolding is gone.
Safety note: do not walk on translucent panels. Use crawl boards or a proper working platform, and follow local rules for work at height.
One system: panels and sealed screws from one supplier
We supply both the FRP panels and the EPDM-sealed screws that fix them, so they can be specified as one system. If you are specifying a roof now, send your purlin layout and sheet profile through the inquiry form and we will come back with a fastener pattern for that roof.
FAQ
What screws should I use for FRP roofing panels?
Self-drilling or self-tapping screws with an EPDM sealing washer, with a coating matched to the environment and a length that fully engages the purlin.
How far apart should FRP roof screws be?
There is no single number. It depends on wind load, purlin spacing, sheet profile and thickness. Laps, ridges, eaves and corners need a denser pattern than the field.
Why pre-drill an oversized hole in FRP sheets?
It lets the sheet expand and contract around the screw shank without loosening the washer seal.
Where should I fix a corrugated FRP sheet?
On the crest, in a straight line, not in the valley where water runs.
Related products
FRP Translucent Roofing Sheets
Our fasteners and wire range also covers nails, tying wire and mesh, for work around the cladding rather than on it.